

Introduction
Recently while staying at home, I often come across some amazing home decoration videos. Every time I watch them, I'm tempted to buy everything, but I always exit the shopping cart after seeing the prices. However, I later discovered that many seemingly expensive decorations can actually be made by hand! And the cost is unbelievably low, usually just a fraction of the retail price.
I love researching these DIY ideas and spend time looking for inspiration on various platforms. After some practice, I've summarized some really fun and practical ideas to share with everyone, guaranteed to instantly give your home that Instagram-worthy feel.
Wall Transformation
Honestly, my walls were previously as plain as they could be, and the bare white walls were making me almost depressed. I initially wanted to buy some decorative paintings, but the prices were off-putting: over a thousand for one piece was honestly a bit painful. Then I had an idea and made my own letter art, and the result was absolutely amazing!
How to do it? First, you need a canvas (just dozens of yuan on Taobao), several bottles of different colored acrylic paints (remember to get matte ones, they look more sophisticated), plus some brushes. I suggest getting three sizes of brushes - large, medium, and small, to create richer effects.
First, sketch your preferred letters or text on the canvas with pencil. I chose the word "LOVE" because it's simple and never gets old. Here's the key part: when coloring, don't be too rigid - you want that casual feel. I used four colors: dark blue, light blue, gold, and white, intentionally letting the paints blend and interweave, which creates a very artistic effect.
After the paint dried, I added a touch of gold on the edges for detail. When hung on the wall, the result really amazed me! When my best friend came over, she thought it was art from 798 and kept asking where I bought it, haha.
Besides letter art, I've also tried creating geometric patterns with colored tape. I bought various colors and widths of washi tape, planned the design on the wall, and applied them circle by circle. This method is perfect for renters since it can be removed anytime without damaging the walls. Plus, changing the pattern occasionally makes the home feel newly decorated.
Recently, I've been working on a new wall decoration plan, preparing to create a photo wall with vintage-style postcards and photos. I've already bought a bunch of retro postcards on Taobao and need to print some of my own photos. My idea is to use stylish clips to attach them to twine, then hang the twine horizontally on the wall. This not only decorates the wall but also allows for easy photo changes to keep the space fresh.
Floral Design
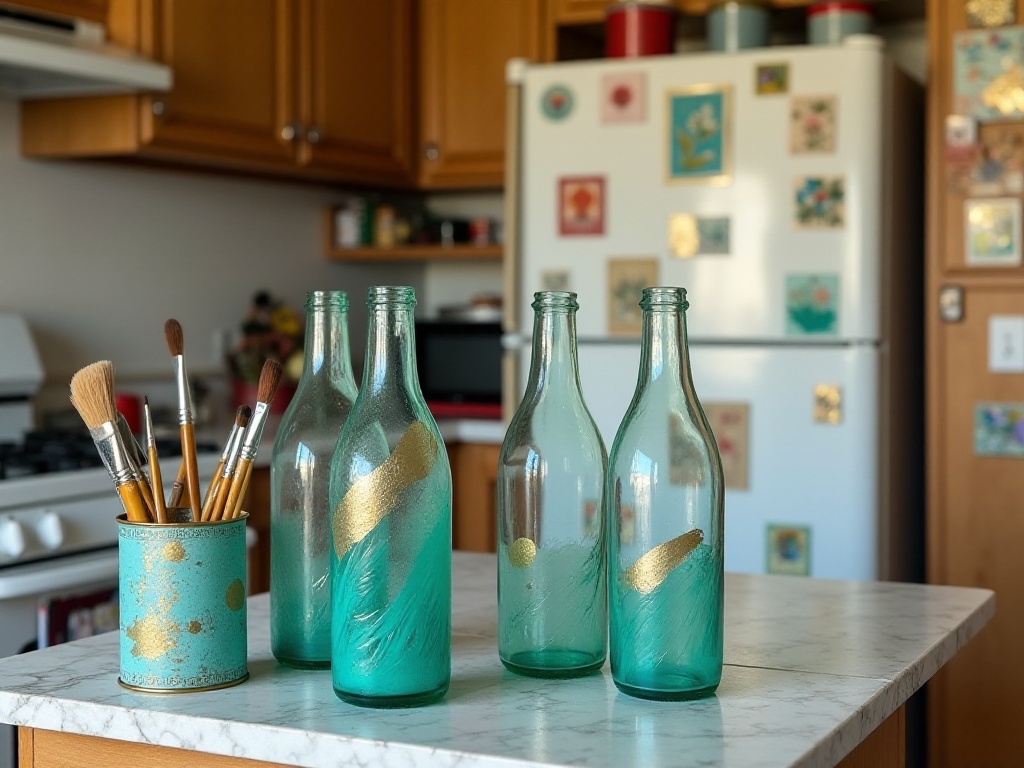
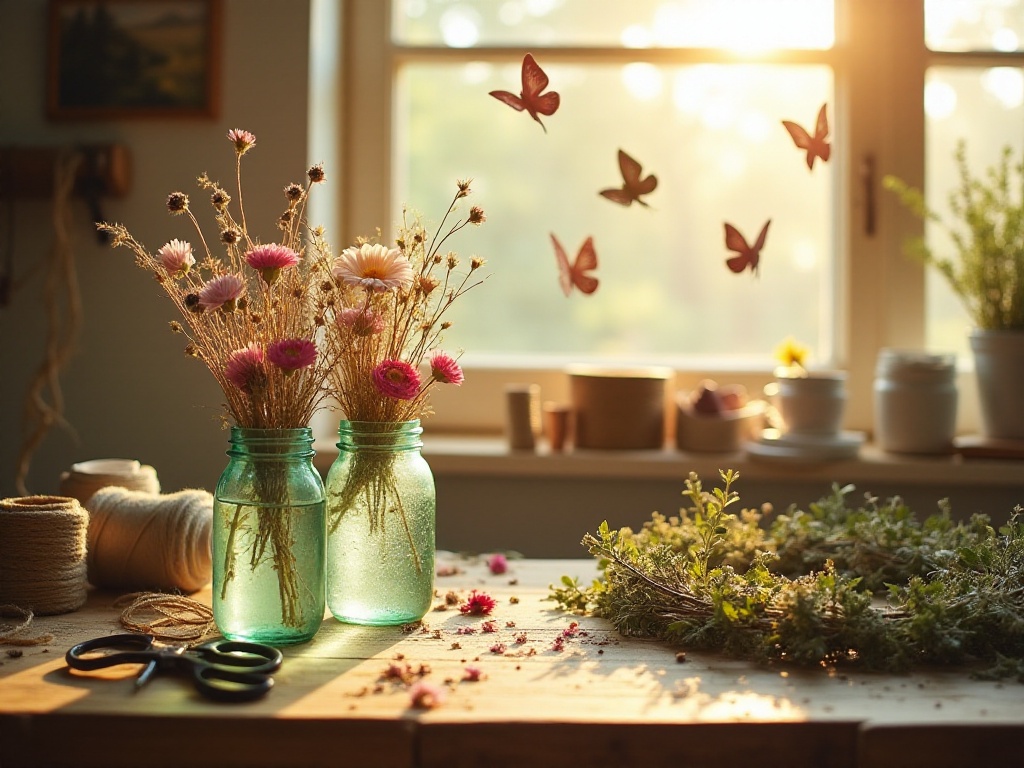
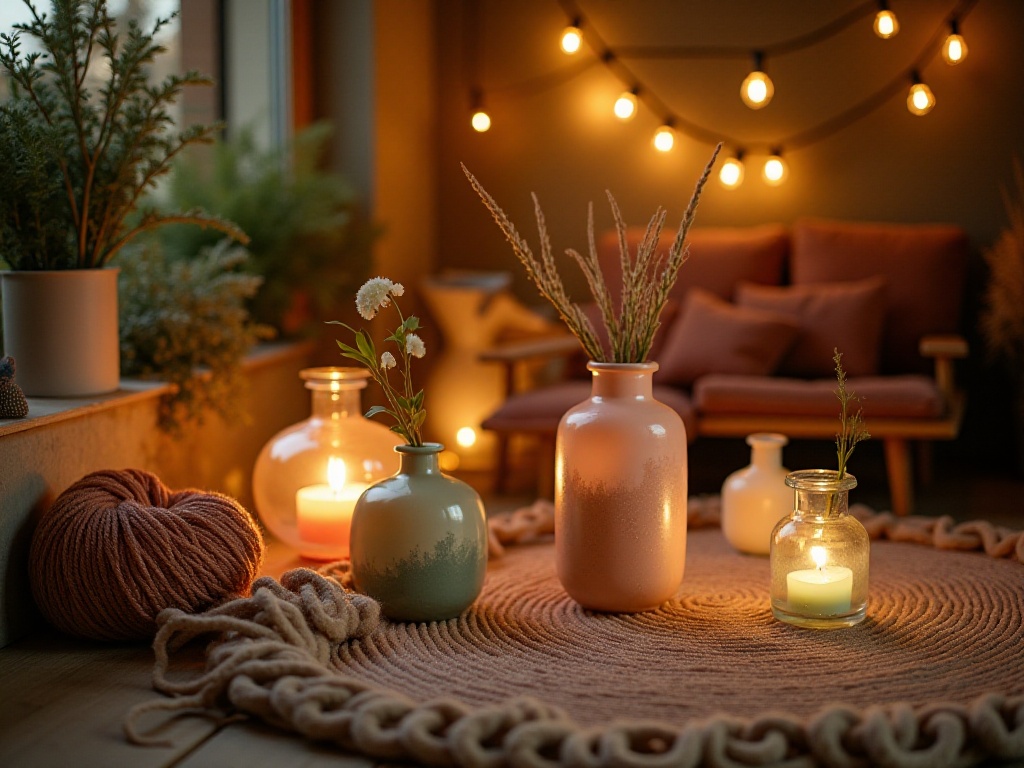
When it comes to home decoration, how could we skip floral arrangements? Last Valentine's Day, I made a special glass vase decoration that turned out absolutely gorgeous! I bought a regular clear glass vase on Taobao for less than 20 yuan. Then I used special glass paint (must be glass-specific paint, regular paint peels off easily) to draw some minimalist line patterns on the outside.
I chose gold and silver paints because these two colors always work well together. The patterns were simple - just some irregular lines and small dots, giving it a bit of an abstract art feel. After the paint completely dried (I waited 24 hours to be safe), I put in some fresh roses, and the entire living room's atmosphere instantly changed.
Later, I extended this idea and collected all the glass bottles at home for decoration. Some I painted with geometric patterns, some with small flowers, and some just with simple star accents. When these bottles are arranged together, it feels like my home instantly has an art gallery vibe.
Now I buy seasonal fresh flowers from the flower market every week, matching them with these hand-painted vases, putting different flowers in different styled vases. On weekends, I sit on the sofa and watch sunlight shine through the vases onto the flowers - it's really therapeutic.
Besides glass vases, I've also tried knitting pot covers. It's like adding a "sweater" to regular ceramic pots, especially suitable for winter. The knitting pattern doesn't need to be too complex - basic stitches work fine. The key is choosing soft yarn, preferably in solid colors or gradients.
Holiday Ideas
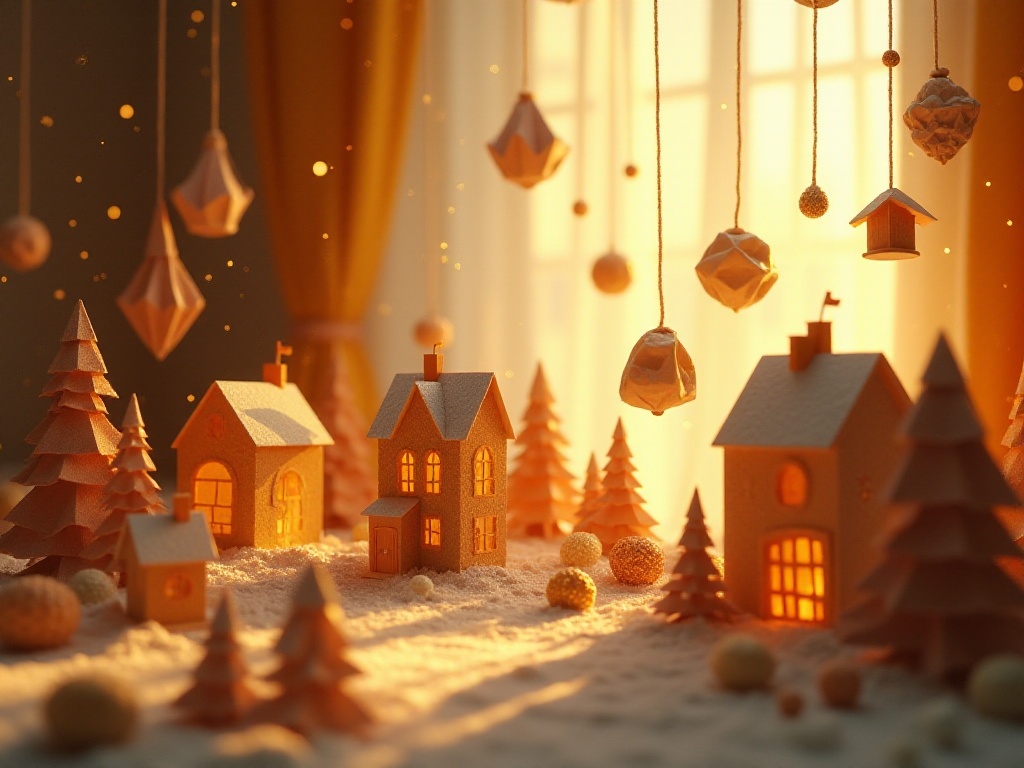
Although Christmas is still far away, I have to share this amazing DIY snow globe idea! Store-bought snow globes can cost hundreds, but making your own costs less than 20% of that.
The materials list is simple: a glass jar (I used an empty jam jar), cute figurines (you can get many for just over ten yuan on Taobao), glitter (finer glitter looks better when floating), glycerin (key ingredient - makes the glitter fall more slowly), and a hot glue gun.
The making process is actually very simple, but you need to pay attention to some details. First, clean the jar and lid thoroughly, preferably wiping with alcohol to ensure the hot glue adheres well. Then use hot glue to fix the figurine to the inside of the lid, making sure to let the glue cool completely.
The next step is crucial: mixing the liquid. It took me many attempts to find the perfect ratio - about 3:1 water to glycerin. This makes the glitter fall at just the right speed, neither too fast nor too slow. When adding the liquid, leave some space to prevent overflow when closing the lid.
The final step is sealing, which is really important! I applied waterproof sealant around the lid's threads, ensuring no liquid would leak. After the sealant dried, I reinforced the lid edges with hot glue. My first snow globe leaked after two days because it wasn't sealed properly - super frustrating.
Now this snow globe sits on my bedside table. Every night before bed, I give it a shake and watch the sparkly glitter slowly fall in the moonlight - it's so relaxing. Plus, it's really photogenic. When I posted it on social media, everyone kept asking where I bought it, haha.

Storage Solutions
Storage is a topic I could discuss all day. Previously, my home was cluttered with miscellaneous items everywhere. After researching various storage solutions, I discovered that many things I almost threw away could become super useful storage tools.
For example, I collected many empty glass jars - jam jars, coffee jars, and some spice bottles. After cleaning them, they still looked ordinary. So I bought some decorative paper on Taobao - floral, striped, solid colors, all in fresh styles.
Here's a tip before applying decorative paper: soak the jar's label in warm water first, making it easier to remove without leaving ugly adhesive residue. Then cut the decorative paper to the right size, being careful to align it properly. I also wrap twine or ribbon around the jar opening for a more designed look.
The transformed glass jars can store various items. My makeup brushes are in a tall jar covered with light pink floral paper, looking very feminine. Smaller jars store hair ties and clips, preventing them from being scattered everywhere.
Speaking of storage, I have another idea I'm particularly proud of. I collected buttons from old clothes, then spray-painted them with colored acrylic paint. Some gold, some silver, and some in macaron colors. After the paint dried, I attached small magnets to the back, creating unique refrigerator magnets.
Now my fridge door is covered with these handmade button magnets, perfect for holding important memos or photos. Friends always compliment this idea when they visit, and the production cost is super low - buttons are free, and paint and magnets together cost just a few dozen yuan.
Practical Tips
While baking cakes at home, I discovered a particularly useful trick. Previously, my cake cutting was always crooked - regular knives either deformed the cake or left messy surfaces. Then I learned about cutting cake with dental floss from a video - it was a lifesaver!
Here's how: take a length of dental floss (preferably unflavored), pull it taut between both hands, and slowly press down from the cake's top. Because the floss is very thin and has some flexibility, it cuts the cake very evenly. Most importantly, this method doesn't compress the cake, keeping each slice perfectly intact.
I've used this method many times now, and friends always compliment how nicely the cake is cut. This works not just for cakes - it's also great for soft cheese or pudding.
Another recent discovery is about home fragrance. I felt my home needed some scent but thought diffusers were too expensive. So I made a simple version: pour warm water into a beautiful glass bowl, add a few drops of essential oil and some dried flowers - it not only spreads fragrance but looks stylish too.
Creative Extensions
Honestly, DIY isn't just about saving money - it's more about making life more interesting. Recently, I've gotten into doing DIY projects with friends, and sharing creative ideas is particularly fun.
Last month, my best friend and I knitted a rug together - probably our biggest DIY project yet. We bought lots of thick yarn from Taobao in several warm colors. Since neither of us had knitting experience, we first learned basic knitting techniques from Bilibili.
The whole process took about two weekends to complete, with many mistakes requiring restarts, but it was really fun. We chatted while knitting, occasionally checking videos to confirm steps. The finished rug might not be as neat as store-bought ones, but every time I see it, I remember those two crazy weekends - it feels really meaningful.
Now the rug sits in front of my desk, and it feels especially warm every time I step on it. Because it's hand-knitted, the lines and colors have a natural irregularity that actually makes it more artistic. Recently, I've been researching how to add some tassel decorations, planning to work on it with my best friend again this weekend.
Final Thoughts
Through this period of DIY practice, I've really discovered that life is full of surprises. Many seemingly ordinary items can become unique decorations with just a bit of creativity. Most importantly, during the hands-on process, you discover that you're actually quite creative.
You don't need particularly professional skills, nor do you need to pursue perfect results. What's important is finding joy in the making process and experiencing the sense of achievement as your ideas gradually become reality - it's really great.
Every time I complete a new DIY project, new ideas pop up. Like dominoes, one creative idea leads to many more. I still have many DIY ideas saved in my notes, waiting to be tried one by one.
If you want to start trying DIY, my advice is to begin with simple projects. Don't fear failure, because every attempt is a learning opportunity. Maybe you'll fall in love with this hands-on creative feeling like I did. Why not try making something this weekend?
Related articles
-
15 Time-Saving Bedroom Organization Tips for a Perfectly Tidy Room
2025-01-16
-

35 Must-Know Home Organization Tips to Transform Your Living Space
2025-02-07
-

33 Life Hacks to Make Your Home Incredibly Organized and Double Your Storage Space
2025-02-27
-

20 Life Hacks to Keep Your Home Organized and Easy to Maintain
2025-01-25